
Key Takeaways
- Always turn off the power at the main switch before you start any electrical work.
- Position wall lights at a comfortable height, usually around eye level, to avoid glare.
- Make sure you use the right screws and wall plugs for your wall type to secure the sconce firmly.
- Connect the wires correctly: live to live, neutral to neutral, and earth to earth.
- Test the light after restoring power, and if it doesn't work, double-check your connections and the bulb.
Understanding Wall Light Sconces
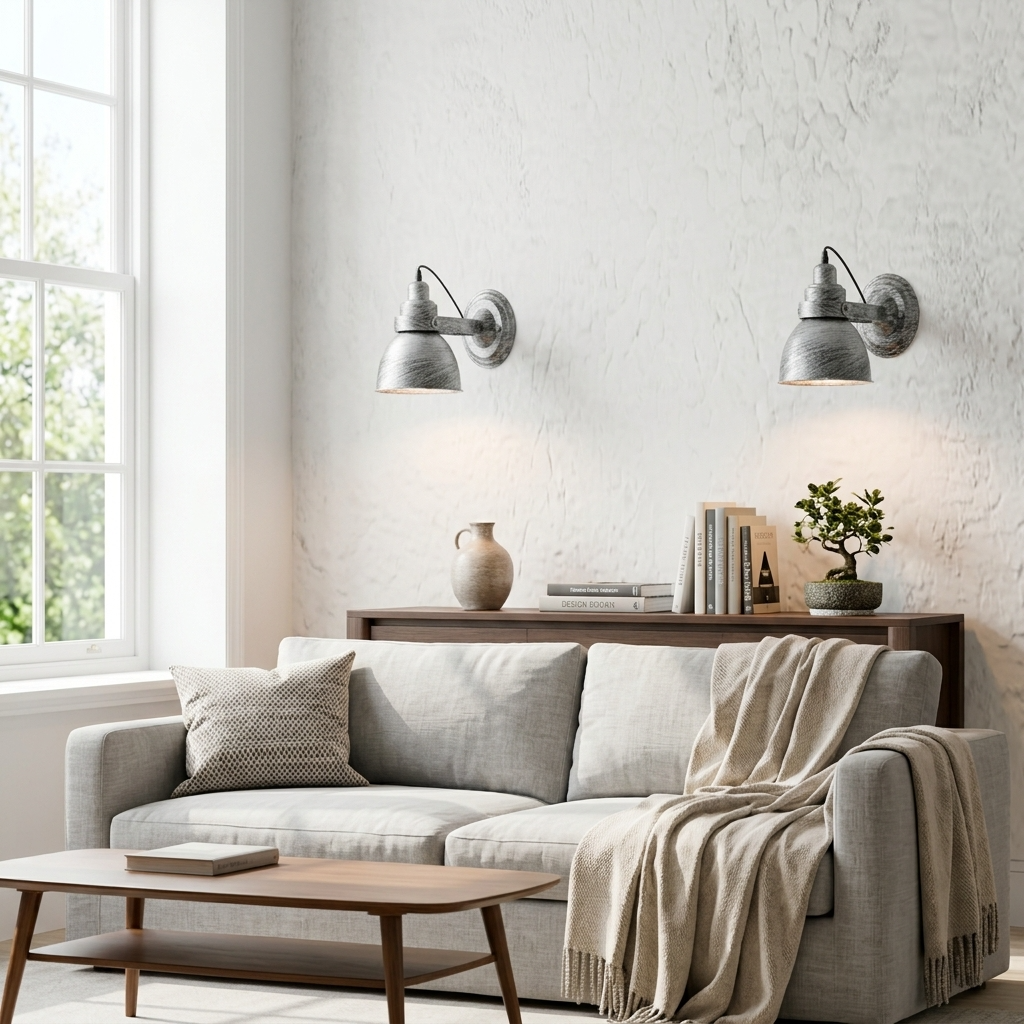
Wall light sconces are a really versatile way to add both style and practical illumination to your home. They've been around for ages, traditionally holding candles or oil, but modern versions offer so much more. Think of them as more than just light fittings; they're decorative elements that can completely change the feel of a room. Whether you're looking to brighten up a dim hallway, add a cosy glow to your living room, or provide focused light for reading, there's a sconce out there for you.
Types of Wall Light Sconces
Wall lights come in a surprising variety of styles, each offering a different look and light effect. It's worth knowing the main types before you start shopping:
- Uplights: These cast light upwards, towards the ceiling. They can make a room feel more spacious and open, and are great for creating a soft, ambient glow.
- Downlights: As you might guess, these direct light downwards. They're good for creating a more intimate, cosy atmosphere, and are often used in living rooms or bedrooms.
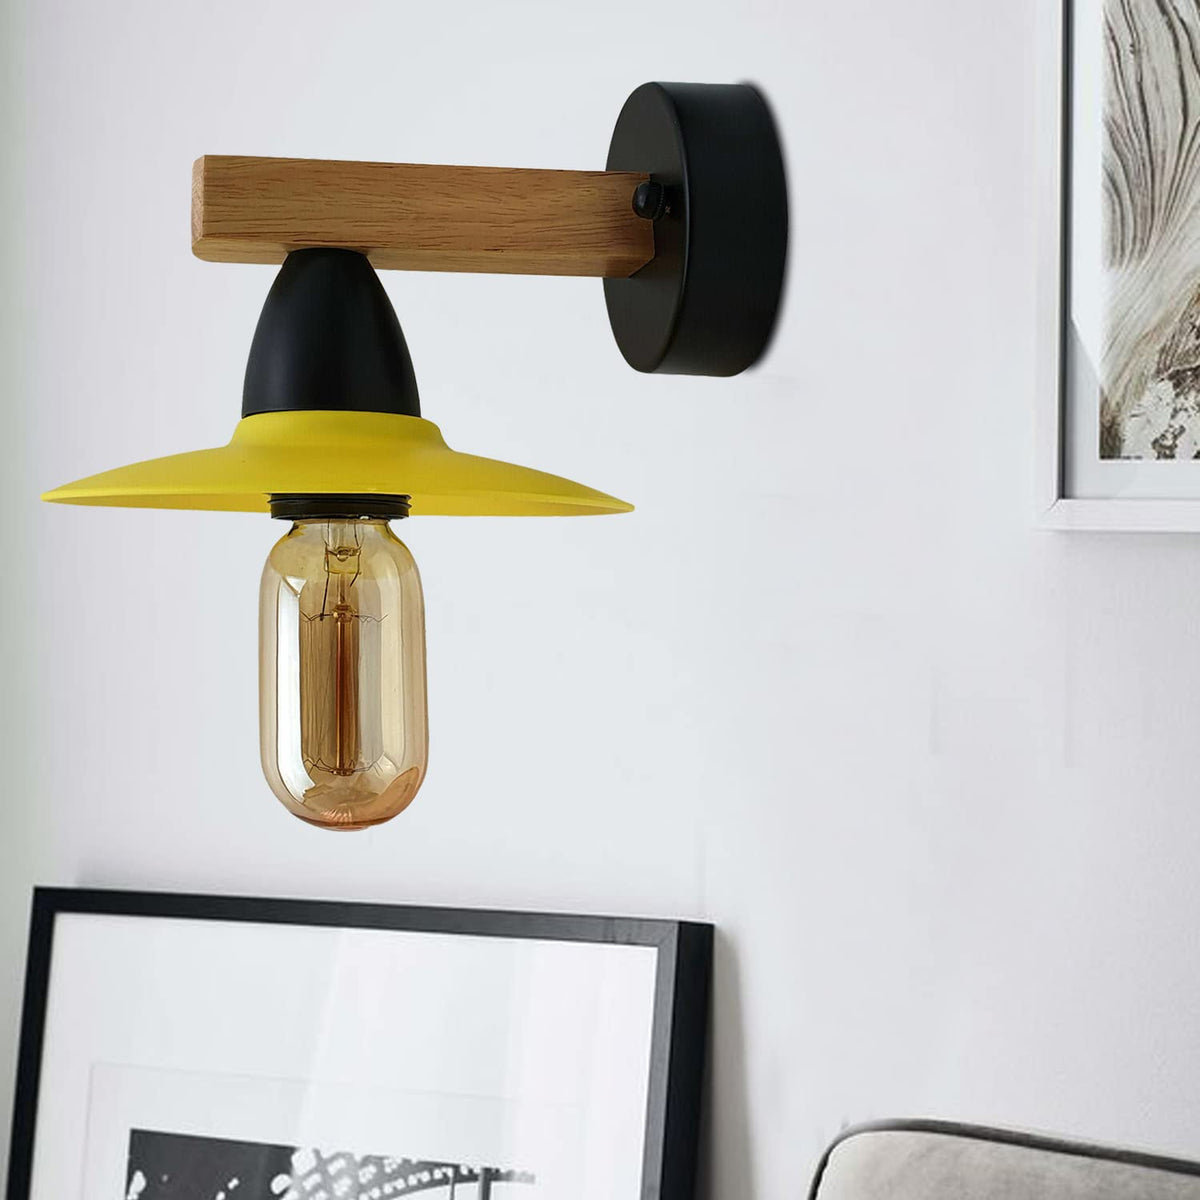
- Sconces: Traditionally decorative, these are mounted directly onto the wall. They can range from classic candle-style designs to more modern flush-mounted options that diffuse light across the wall.
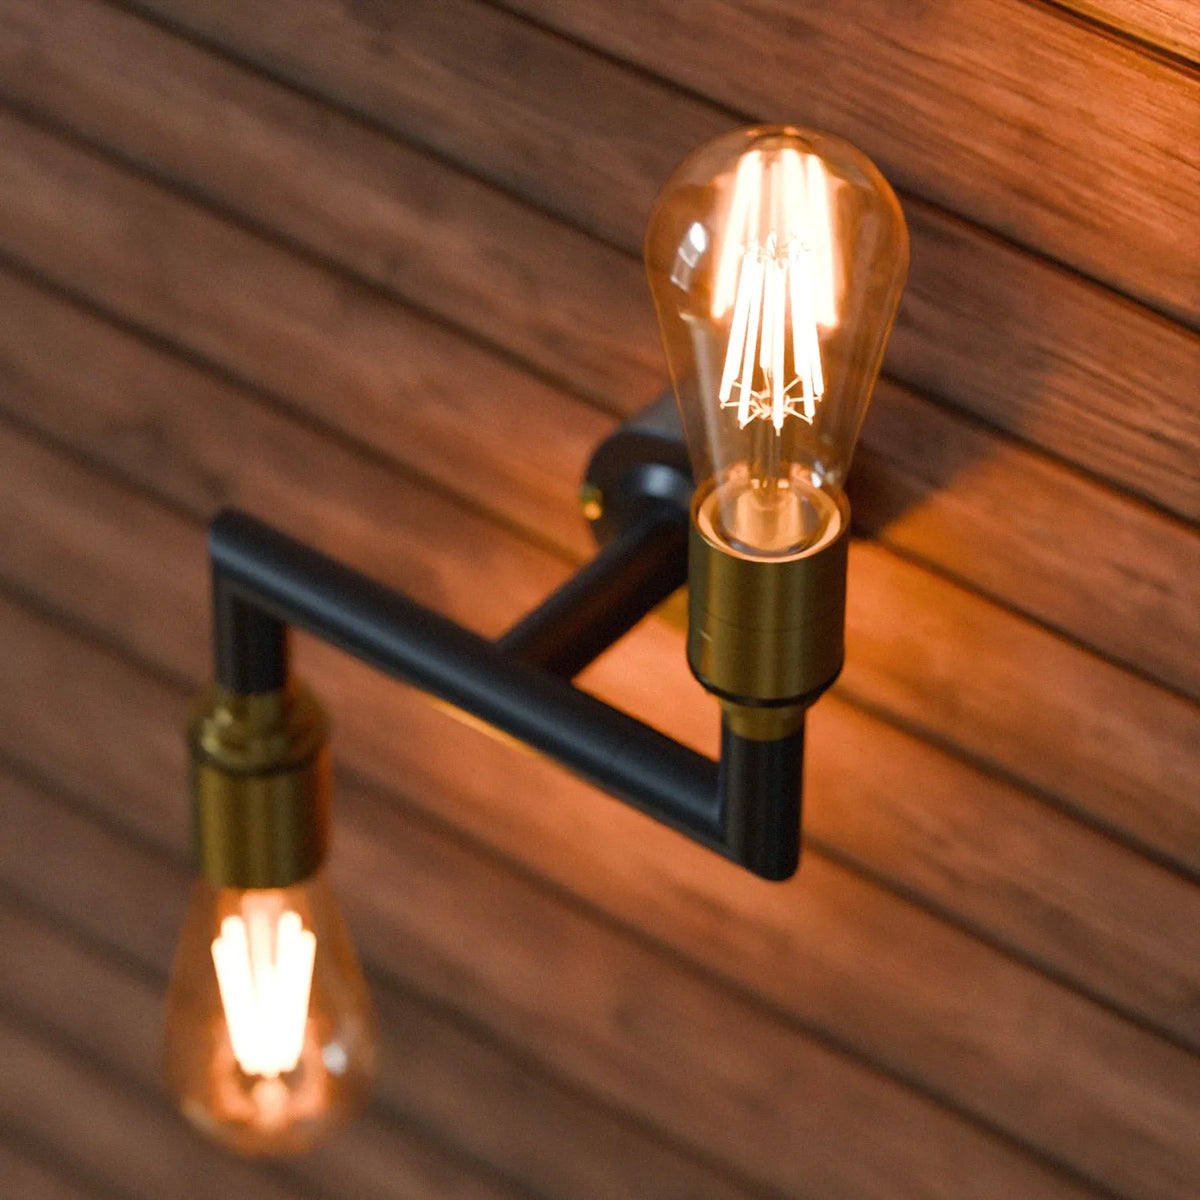
- Articulated/Swing Arm Lights: These have adjustable arms, meaning you can direct the light exactly where you need it. They're brilliant for reading nooks or as bedside lights, freeing up space on tables.
- Picture Lights: Specifically designed to illuminate artwork, these are usually long and narrow, sitting above a picture or shelf.
Decorative vs. Functional Sconces
When you're choosing a sconce, it's helpful to think about whether its main job will be to look good, to provide light, or a bit of both. Some sconces are purely ornamental, adding a touch of elegance or character to a wall, even when they're not switched on. Others are designed with a specific purpose in mind, like providing task lighting for reading or illuminating a specific area. Many sconces manage to be both decorative and functional, offering a beautiful design that also casts a useful light. For example, a stylish swing arm light can be a real statement piece while also being perfect for your evening read. You can find a wide range of beautiful bedroom wall lights that fit this bill.
Choosing the Right Sconce Style
Picking the right style is all about matching the sconce to your room's decor and the effect you want to achieve. Think about the overall look you're going for. Do you want something traditional and ornate, or sleek and modern? Materials also play a big part – glass, metal, fabric, and ceramic all give different vibes. Consider the colour of the light too; some shades create a warmer, softer light, while others are more direct. It's also a good idea to think about how the light will interact with your existing decor. For instance, a pair of matching sconces can beautifully highlight a fireplace or a piece of art, adding a real focal point to the room. When you're planning your lighting scheme, it's worth looking at essential factors like brightness and placement to get the best results.


Planning Your Wall Light Sconce Installation
Right then, before you start drilling holes and wrestling with wires, a bit of planning goes a long way. Getting the placement and height spot on makes all the difference between a stylish addition and a bit of an eyesore. It’s not just about where you can put a light, but where you should.
Determining Optimal Sconce Height
So, how high should these things actually go? It’s not a one-size-fits-all situation, but there are some good starting points. Generally, aim for the top of the sconce to be around eye level. This usually works out to be about 150cm to 170cm from the floor. This height helps avoid direct glare from the bulb, which nobody wants.
However, this can change. If you have really high ceilings, you might want to go a bit higher. For bedside reading lights, you'll want them lower, maybe around 120cm to 140cm, so you can easily reach the switch from bed. It’s all about making them practical for their purpose.
Here’s a quick rundown:
- General Living Areas/Hallways: 150cm - 170cm from the floor.
- Bedside Reading: 120cm - 140cm from the floor.
- Above Artwork: Positioned to illuminate the piece effectively, often slightly above.
Spacing Wall Lights Effectively
If you're fitting more than one sconce, spacing is key. You don't want them crammed together or miles apart. For general ambient lighting, like down a hallway, try spacing them about 2.5 to 3 meters apart. This gives a nice, even spread of light. If you're placing them either side of something, like a mirror or a fireplace, make sure they're balanced. The goal is symmetry and a pleasing visual rhythm.
Considering Room Proportions and Ceiling Height
This ties into height and spacing. A tiny sconce on a massive wall can look lost, and a huge one in a small room can feel overwhelming. Think about the scale of your room. For rooms with high ceilings, you have more flexibility with height, but you might need larger or more prominent sconces to match the space. Conversely, in smaller rooms or those with lower ceilings, opt for more streamlined designs and perhaps mount them slightly lower to avoid making the room feel cramped. This is part of the whole wall light installation UK process that people often overlook. When you're thinking about how to wire a wall light in the UK, don't forget the visual impact.
Preparing the Installation Area
Installing a wall light sconce isn’t just about picking the right fixture – the way you get your space ready makes a big difference. Proper prep at this stage will save you loads of hassle later on and help things go smoothly.
Isolating the Power Supply
Before you get near any wires, shut off the electricity at the consumer unit (your fuse box). Not just the switch by the door—turn off the circuit for the lights you’ll be working on. Use a voltage tester at the fitting or junction box to check everything’s dead before you touch anything.
- Switch off the appropriate circuit breaker
- Put a bit of tape over the breaker as a reminder
- Use a tester to confirm there’s no current at your work spot
Locating Existing Wiring or Junction Boxes
You’ll want to figure out if there’s existing wiring behind the wall, or if you’ll need to run new cables. In older houses, sometimes you get lucky and there’s already a junction box nearby. If not, think about how far you’ll have to chase wires through the wall – nobody likes extra work without good reason.
- Remove the old fitting (if there is one)
- Use a wire detector to spot hidden cables or pipes
- Identify any suitable nearby junction box
Marking the Sconce Position
Once you know where your cables are, it’s time to decide exactly where the sconce will go. The trick is to line it up with the rest of your room, not just slap it up anywhere. I like to use a bit of painter’s tape to try different heights—it’s less permanent than pencil marks if you change your mind.
Here’s a simple checklist for marking your spot:
- Measure the recommended height from the floor (usually around 150–170cm, but adjust for your room).
- Check for symmetry with doorways, other lights, and furniture.
- Mark the screw holes clearly, double-checking the sconce bracket against the marks.
- Keep a spirit level handy so the fixture doesn’t end up wonky.
Wiring and Mounting Your Sconce
Right then, this is where things get a bit more hands-on. You've got your spot marked, power's off (we hope!), and now it's time to actually connect the wires and get the sconce onto the wall. It might seem a bit daunting, but if you take it step-by-step, it's totally manageable.
Connecting the Electrical Wires
This is the bit that makes people nervous, but it's really just about matching colors. Always double-check that the power is definitely off at the breaker before you touch any wires. Seriously, don't skip this. You'll usually find three types of wires: earth (green and yellow), neutral (blue), and live (brown). Your sconce will have corresponding wires. You'll need to connect the earth wire from the sconce to the earth wire in your wall, the neutral to neutral, and the live to live. Use the little plastic connectors, often called wire nuts, to make sure each connection is secure. Give them a gentle tug to be sure they won't come loose. If you're unsure about any of this, it's always best to get a qualified electrician to do this part for you. For more on safe wiring, check out this guide on bedroom wall lights.
Securing the Sconce to the Wall
Once the wiring is sorted, you need to fix the sconce's mounting bracket to the wall. This bracket is what the actual light fitting will attach to. Use the screws provided with your sconce, and make sure they go into the wall securely. If you're screwing into plasterboard, you might need to use wall plugs (or 'anchors,' as some call them) to give the screws something solid to grip. The bracket needs to be absolutely solid; you don't want your new light wobbling about.
Attaching the Light Fitting
Now for the satisfying part! Most sconces have a way of attaching the main body to the mounting bracket you've just secured. This could be a screw mechanism, a clip, or a couple of small screws. Follow the manufacturer's instructions for your specific model. Once it's attached, give it a gentle wiggle to make sure it's firmly in place. This is also the time to screw in your light bulb—make sure it's the correct wattage for the fitting, as stated on the sconce itself.
Final Checks and Testing
Right then, you've wired it up and got the sconce looking smart on the wall. Now for the moment of truth – making sure it all works safely. It’s not just about flicking the switch and hoping for the best, though. We need to be a bit methodical here.
Restoring Power and Testing
First things first, double-check all your connections inside the fitting and at the junction box. Make sure no stray wires are poking out and that everything is tucked away neatly. Once you're confident, it's time to bring the power back. Go back to your consumer unit and switch the breaker for that circuit back on. Then, head back to your newly installed sconce and give the switch a flick. Hopefully, you'll be greeted by a warm glow. If it lights up, brilliant! You've done it. If not, don't panic just yet; we'll look at what might have gone wrong
Ensuring a Secure and Safe Installation
Once you've confirmed the light is working, give the sconce a gentle wiggle. It should feel completely solid and firmly attached to the wall. Any movement could mean the fixings aren't tight enough, or you might have used the wrong type of wall plugs for your wall material. Make sure the cable is also secured and not dangling where it could be snagged. A well-installed light isn't just about looks; it's about being safe for years to come. If you're changing an old light fitting, remember to dispose of the old one responsibly.
| Issue | Possible Cause | Solution |
|---|---|---|
| Light doesn't turn on | No power to circuit / Loose wiring | Check breaker, re-check all connections at sconce, switch, and junction box |
| Flickering light | Loose connection / Incorrect bulb wattage | Tighten connections, check bulb is correct and seated properly |
| Breaker trips | Short circuit / Faulty fitting | Inspect wiring for crossed wires and check fitting for damage |
| Sconce feels loose | Fixings not tight / Wrong fixings for wall type | Tighten all screws and use appropriate wall plugs for your wall material |
Conclusion
So there you have it, a pretty straightforward way to get those wall lights up and looking good. It might seem a bit daunting at first, especially with the electrics involved, but by taking your time and following these steps, you can add a lovely bit of extra light and style to your home. Remember, safety first, always switch off the power, and if you're ever unsure, it's best to get a qualified electrician to help out. Enjoy your new lighting!